At DTF Woodstock, we pride ourselves on delivering high-quality DTF transfers that make creating custom apparel easy and efficient. Whether you're a seasoned professional or new to DTF, this guide will walk you through the application process to achieve perfect results every time.
What You’ll Need:
Before getting started, ensure you have the following tools and materials:
- DTF transfer (from DTF Woodstock)
- Garment (cotton, polyester, blends, etc.)
- Heat press machine
- Parchment paper or silicone sheet (optional)
- Lint roller
Step-by-Step DTF Application Instructions
Step 1: Prepare the Garment
- Choose a clean, flat surface: Ensure the garment is clean and free from wrinkles.
- Remove lint: Use a lint roller to eliminate any debris that could interfere with the transfer.
Step 2: Heat Press Preheating
- Set the temperature: Preheat your heat press to 300 - 315°F (149-157°C). The exact temperature may vary depending on the garment and transfer type.
- Adjust the pressure: Use medium to firm pressure for optimal adhesion.
Step 3: Pre-Press the Garment
- Place the garment on the heat press plate.
- Press the garment for 5–10 seconds without the transfer to remove moisture and wrinkles.
Step 4: Position the DTF Transfer
- Place the DTF transfer film face down (design side touching the garment) on the desired area of the fabric.
- Secure the transfer in place if necessary with heat-resistant tape to prevent shifting.
Step 5: Heat Press the Transfer
- Close the heat press and apply heat for 10–15 seconds.
- Maintain consistent medium to firm pressure during the process.
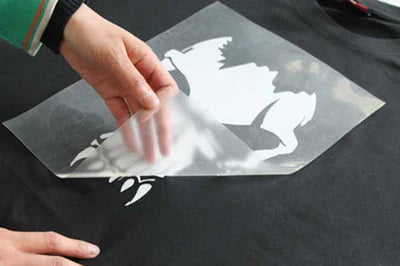
Step 6: Peel the Film
- Allow the garment and transfer to cool for 5 seconds before peeling.
- Peel the quick film (refer to the instructions provided with your order).
- For cold peel, wait until the transfer is completely cool.
- For quick peel, peel while slightly warm but not hot.
Step 7: Re-Press (Recommended)
- To lock in the design and enhance durability, cover the design with parchment paper or a silicone sheet.
- Press again for 10 - 15 seconds.
Step 8: Inspect and Enjoy!
- Inspect the garment for any missed areas or issues.
- Your custom apparel is ready to wear or sell!
Pro Tips for Success
- Test First: For new garments or materials, do a small test press to ensure compatibility.
- Heat Press Calibration: Regularly calibrate your heat press to ensure accurate temperature and pressure settings.
- Care Instructions: Wash garments inside out in cold water and tumble dry low for maximum longevity.